Exclusives
The Administrator
Our take
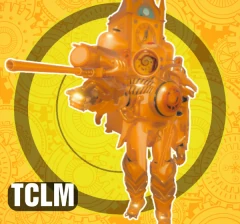
The Administrator is a late game tower that boosts allies, spawns units and ranks among the hardest hitters in raw damage. Its damage for the money is only about average, so its value comes from the boosts and units as much as the hits. Hidden and flying detection come from placement. You can only place a few, and the early and middle upgrades give the best damage per cash. The Dragon and Colossal Clockman are similar priced choices.
- Placement price
- 24th cheapest of 32 in Exclusives
- Cost to max
- 708M$
- DPS at max level
- 210M
- DPS per 1k$ spent
- 296, 60th of 119 towers
- Hidden detection
- From placement
- Air detection
- From placement
Written by rowikis from the tower's stats, not copied from the Trello.
The Administrator is an end game tower you get by solving the ARG. He fights with SLAM, SHOOT and DAGGER early on, adds LASER, ORBITAL and SAW at later levels, brings 05-13 along with his attacks, and boosts the damage of towers around him.
Damage boost
At every level he gives nearby towers a 20% damage boost, reaching out to a boost range of 5Km.
Passives
- He shrugs off stuns, which are capped at 1s for him.
- Life Energy towers near him buff him back: he gains 5% damage for each tower he is boosting.
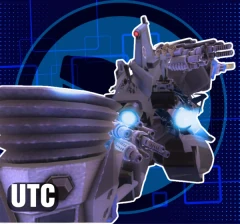
- His boost works on every tower around him, including ones like utclm, utc:P and uttvm.
Sacrifice ability
Sacrifice costs 10M$ and only becomes available at max level. He channels the power of 1000 supernovas into one huge AOE explosion that kills him.
- At max level he also lists 345B and 7.5% hp no matter what, with 1 time use.
- After the blast he fades away and cannot be placed again for the rest of that match.
Perks and quests
- Perk: ARG PART 2, which unlocks the Sacrifice ability.
- Quests: the Loadout breaker quests.
Stats by level
Level 0
- Price
- 6.5M$
- Unlocks
- ATTACK: SLAM + 05-13
- Resistance
- 10k
- Hidden detection
- Yes
- Air Detection
- Yes
- SLAM: DPS
- 2M
- SLAM: Damage
- 10M
- SLAM: Attack Cooldown
- 5s
- SLAM: Range
- 125m
- SLAM: Explosion Range
- 50m
- O5-13: Unit Health
- 2.2M
- O5-13: Unit Hidden Detection
- Yes
- O5-13: Unit Speed
- 5
- O5-13: Unit Spawn time
- 180s
- O5-13: Unit Air Detection
- Yes
- O5-13: Unit Cap
- 1
- SHOOT: DPS
- 843k
- SHOOT: Damage
- 843k
- SHOOT: Attack Cooldown
- 1s
- SHOOT: Explosion Range
- 5m
- SHOOT: Range
- 170m
- DAGGER: DPS
- 750k
- DAGGER: Damage
- 750k
- DAGGER: Attack Cooldown
- 1s
- DAGGER: Attack Angle
- 50º
- DAGGER: Range
- 85m
Level 1
- Price
- 9.5M$
- Unlocks
- ATTACK: SLAM + 05-13
- Resistance
- 1k
- Hidden detection
- Yes
- Air Detection
- Yes
- SLAM: DPS
- 3.2M
- SLAM: Damage
- 16M
- SLAM: Attack Cooldown
- 5s
- SLAM: Range
- 165m
- SLAM: Explosion Range
- 65m
- O5-13: Unit Health
- 3.5M
- O5-13: Unit Hidden Detection
- Yes
- O5-13: Unit Speed
- 5
- O5-13: Unit Spawn time
- 180s
- O5-13: Unit Air Detection
- Yes
- O5-13: Unit Cap
- 1
- SHOOT: DPS
- 1.32M
- SHOOT: Damage
- 1.32M
- SHOOT: Attack Cooldown
- 1s
- SHOOT: Explosion Range
- 5m
- SHOOT: Range
- 170m
- DAGGER: DPS
- 1.59M
- DAGGER: Damage
- 1.325M
- DAGGER: Attack Cooldown
- 1s
- DAGGER: Attack Angle
- 50º
- DAGGER: Range
- 85m
Level 2
- Price
- 40.5M$
- Unlocks
- ATTACK: LASER + 05-13
- Resistance
- 1k
- Hidden detection
- Yes
- Air Detection
- Yes
- LASER: DPS
- 22.15M
- LASER: Damage
- 2.21M
- LASER: Attack Cooldown
- 0.1s
- LASER: Range
- 225m
- LASER: Attack Angle
- 10º
- O5-13: Unit Health
- 5.55M
- O5-13: Unit Hidden Detection
- Yes
- O5-13: Unit Speed
- 5
- O5-13: Unit Spawn time
- 180s
- O5-13: Unit Air Detection
- Yes
- O5-13: Unit Cap
- 1
- SHOOT: DPS
- 1.99M
- SHOOT: Damage
- 1.99M
- SHOOT: Attack Cooldown
- 1s
- SHOOT: Explosion Range
- 5m
- SHOOT: Range
- 170m
- DAGGER: DPS
- 2.19M
- DAGGER: Damage
- 2.19M
- DAGGER: Attack Cooldown
- 1s
- DAGGER: Attack Angle
- 50º
- DAGGER: Range
- 85m
Level 3
- Price
- 113M$
- Unlocks
- ATTACK: LASER + 05-13
- Resistance
- 10k
- Hidden detection
- Yes
- Air Detection
- Yes
- LASER: DPS
- 27.15M
- LASER: Damage
- 2.71M
- LASER: Attack Cooldown
- 0.1s
- LASER: Range
- 250m
- LASER: Attack Angle
- 10º
- O5-13: Unit Health
- 50M
- O5-13: Unit Hidden Detection
- Yes
- O5-13: Unit Speed
- 5
- O5-13: Unit Spawn time
- 180s
- O5-13: Unit Air Detection
- Yes
- O5-13: Unit Cap
- 1
- SHOOT: DPS
- 7.2M
- SHOOT: Damage
- 7.2M
- SHOOT: Attack Cooldown
- 1s
- SHOOT: Explosion Range
- 5m
- SHOOT: Range
- 170m
- DAGGER: DPS
- 8.4m
- DAGGER: Damage
- 8.4m
- DAGGER: Attack Cooldown
- 1s
- DAGGER: Attack Angle
- 50º
- DAGGER: Range
- 85m
Level 4
- Price
- 152.5M$
- Unlocks
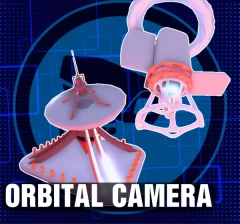
- ATTACK: LASER + 05-13 + ORBITAL
- Resistance
- 10k
- Hidden detection
- Yes
- Air Detection
- Yes
- LASER: DPS
- 37.15M
- LASER: Damage
- 3.71M
- LASER: Attack Cooldown
- 0.1s
- LASER: Range
- 275m
- LASER: Attack Angle
- 10º
- ORBITAL: DPS
- 37M
- ORBITAL: Damage
- 3.7B
- ORBITAL: Attack Cooldown
- 100s
- ORBITAL: Range
- 999m
- ORBITAL: Explosion Range
- 100m
- O5-13: Unit Health
- 72M
- O5-13: Unit Hidden Detection
- Yes
- O5-13: Unit Speed
- 5
- O5-13: Unit Spawn time
- 180s
- O5-13: Unit Air Detection
- Yes
- O5-13: Unit Cap
- 1
- SHOOT: DPS
- 9m
- SHOOT: Damage
- 9M
- SHOOT: Attack Cooldown
- 1s
- SHOOT: Explosion Range
- 5m
- SHOOT: Range
- 170m
- DAGGER: DPS
- 12.6m
- DAGGER: Damage
- 12.6m
- DAGGER: Attack Cooldown
- 1s
- DAGGER: Attack Angle
- 50º
- DAGGER: Range
- 85m
Level 5
- Price
- 185M$
- Unlocks
- ATTACK: LASER + 05-13 + ORBITAL
- Resistance
- 10k
- Hidden detection
- Yes
- Air Detection
- Yes
- LASER: DPS
- 55.15M
- LASER: Damage
- 5.51M
- LASER: Attack Cooldown
- 0.1s
- LASER: Range
- 285m
- LASER: Attack Angle
- 10º
- ORBITAL: DPS
- 50M
- ORBITAL: Damage
- 5B
- ORBITAL: Attack Cooldown
- 100s
- ORBITAL: Range
- 999m
- ORBITAL: Explosion Range
- 115m
- O5-13: Unit Health
- 122M
- O5-13: Unit Hidden Detection
- Yes
- O5-13: Unit Speed
- 5
- O5-13: Unit Spawn time
- 180s
- O5-13: Unit Air Detection
- Yes
- O5-13: Unit Cap
- 1
- SHOOT: DPS
- 12.6M
- SHOOT: Damage
- 12.6M
- SHOOT: Attack Cooldown
- 1s
- SHOOT: Explosion Range
- 5m
- SHOOT: Range
- 170m
- DAGGER: DPS
- 18.63m
- DAGGER: Damage
- 18.63M
- DAGGER: Attack Cooldown
- 1s
- DAGGER: Attack Angle
- 50º
- DAGGER: Range
- 85m
Level 6
- Price
- 201M$
- Unlocks
- ATTACK: SAW + 05-13 + ORBITAL
- Resistance
- 10k
- Hidden detection
- Yes
- Air Detection
- Yes
- SAW: DPS
- 93.93
- SAW: Damage
- 281.81M
- SAW: Attack Cooldown
- 3s
- SAW: Range
- 200m
- SAW: Attack Angle
- 360º
- ORBITAL: DPS
- 75M
- ORBITAL: Damage
- 7.5B
- ORBITAL: Attack Cooldown
- 100s
- ORBITAL: Range
- 999m
- ORBITAL: Explosion Range
- 140m
- O5-13: Unit Health
- 162M
- O5-13: Unit Hidden Detection
- Yes
- O5-13: Unit Speed
- 5
- O5-13: Unit Spawn time
- 180s
- O5-13: Unit Air Detection
- Yes
- O5-13: Unit Cap
- 1
- SHOOT: DPS
- 22.23M
- SHOOT: Damage
- 22.23M
- SHOOT: Attack Cooldown
- 1s
- SHOOT: Explosion Range
- 5m
- SHOOT: Range
- 170m
- DAGGER: DPS
- 34.23M
- DAGGER: Damage
- 34.23m
- DAGGER: Attack Cooldown
- 1s
- DAGGER: Attack Angle
- 50º
- DAGGER: Range
- 85m
Level 7
- Price
- [MAX] - 662.121.211$
- Unlocks
- ATTACK: SAW + 05-13 + ORBITAL
- Resistance
- 10k
- Hidden detection
- Yes
- Air Detection
- Yes
- SAW: DPS
- 118.93M
- SAW: Damage
- 356.81M
- SAW: Attack Cooldown
- 3s
- SAW: Range
- 225m
- SAW: Attack Angle
- 360º
- ORBITAL: DPS
- 90.52M
- ORBITAL: Damage
- 9.06B
- ORBITAL: Attack Cooldown
- 100s
- ORBITAL: Range
- 999m
- ORBITAL: Explosion Range
- 200m
- O5-13: Unit Health
- 2.52B
- O5-13: Unit Hidden Detection
- Yes
- O5-13: Unit Speed
- 5
- O5-13: Unit Spawn time
- 180s
- O5-13: Unit Air Detection
- Yes
- O5-13: Unit Cap
- 1
- SHOOT: DPS
- 30.63M
- SHOOT: Damage
- 30.63M
- SHOOT: Attack Cooldown
- 1s
- SHOOT: Explosion Range
- 5m
- SHOOT: Range
- 170m
- DAGGER: DPS
- 60.63M
- DAGGER: Damage
- 60.63M
- DAGGER: Attack Cooldown
- 1s
- DAGGER: Attack Angle
- 50º
- DAGGER: Range
- 85m
- 345B: TOTAL DPS
- 209.55M
- 345B: TOTAL DPS WITH SUMMON
- 300.81m
- 345B: TOTAL DPS WITH SUMMON + SYNERGY
- ∞ Potential.
Is he worth it?
Right now he is one of the toughest units to unlock, since the grind asks for towers like awk creator and upg carrier. The effort pays off thanks to the nuke damage and the passive that boosts any tower by 20%.
Written by rowikis from the The Administrator card on the official Skibi Defense Trello.
Upgrade costs
| Level | Price | Spent so far | DPS | DPS added per 1k$ |
|---|---|---|---|---|
| Level 0 | 6.5M$ | 6.5M$ | 3.59M | 553 |
| Level 1 | 9.5M$ | 16M$ | 6.11M | 265 |
| Level 2 · best value | 40.5M$ | 56.5M$ | 26.3M | 499 |
| Level 3 | 113M$ | 170M$ | 42.8M | 145 |
| Level 4 | 153M$ | 322M$ | 95.8M | 348 |
| Level 5 | 185M$ | 507M$ | 136M | 220 |
| Level 6 | 201M$ | 708M$ | 210M | 364 |
Worked out by rowikis from the levels on the card. Best value is the upgrade that adds the most damage for its price.