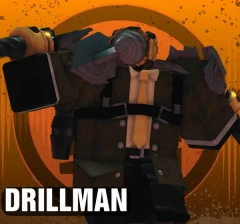
Drills
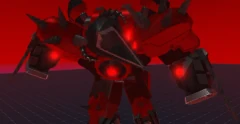
Colossal Drillguy
Our take
Colossal Drillguy is a mid game Drills tower with strong raw damage and the ability to Relocate when the fight moves. It sees hidden enemies from placement. Damage for the money is about average, and it is among the most expensive in its list, so save up before you place it. Push it all the way, since the max level upgrade adds the most damage per cash. Upgraded DJ toilet Mech and Secret Agent are similar priced options.
- Placement price
- 6th cheapest of 8 in Drills
- Cost to max
- 109M$
- DPS at max level
- 32.8M
- DPS per 1k$ spent
- 302, 59th of 119 towers
- Hidden detection
- From placement
Written by rowikis from the tower's stats, not copied from the Trello.
Colossal Drillguy is a late game tower bought with Multiverse Coins. It hits with a Core Blast and charging Drills, can relocate around the map and damage enemies where it lands, and gains Earthquake at level 2, Missile Launch at level 3, and Pickaxe Slash plus Pickaxe Toss at max level.
Attacks
- Core Blast: an explosive attack it has from the start.
- Drills: charge up before hitting, can overcharge, and take time to retarget.
- Relocate: moving the tower deals damage around its new spot.
- Earthquake: added at level 2.
- Missile Launch: added at level 3.
- Pickaxe Slash and Pickaxe Toss: both added at max level.
Attack switch mode
Max level also adds a new ability that flips the tower between its pickaxe attacks and its drill attacks. Each switch costs 1 dollar.
Stats by level
Level 0
- Price
- 8m
- Hidden Detection
- Yes
- Hidden Detection
- Yes
- Resistance
- 1k
- Core Blast: DPS
- 1.41m
- Core Blast: Damage
- 34m
- Core Blast: Attack Cooldown
- 24s
- Core Blast: Range
- 145m
- Core Blast: Explosion Range
- 15m
- Drills: Maximum DPS
- 3m
- Drills: Maximum Damage
- 300k
- Drills: Attack Cooldown
- 0.1s
- Drills: Range
- 80m
- Drills: Charge Time
- 5s
- Drills: Retargetting Time
- 0.01s
- Drills: Overcharge Amount
- 30m
- Drills: Overcharge Cooldown
- 5s
- Relocate: Relocate Damage
- 100m
- Relocate: Relocate Cooldown
- 30s
- Relocate: Relocate Damage Range
- 50m
Level 1
- Price
- 12.5m
- Hidden Detection
- Yes
- Hidden Detection
- Yes
- Resistance
- 1k
- Core Blast: DPS
- 2.5m
- Core Blast: Damage
- 60m
- Core Blast: Attack Cooldown
- 24s
- Core Blast: Range
- 155m
- Core Blast: Explosion Range
- 15m
- Drills: Maximum DPS
- 5m
- Drills: Maximum Damage
- 500k
- Drills: Attack Cooldown
- 0.1s
- Drills: Range
- 80m
- Drills: Charge Time
- 5s
- Drills: Retargetting Time
- 0.01s
- Drills: Overcharge Amount
- 50m
- Drills: Overcharge Cooldown
- 5s
- Relocate: Relocate Damage
- 15m
- Relocate: Relocate Cooldown
- 30s
- Relocate: Relocate Damage Range
- 55m
Level 2
- Price
- 15.5m
- Unlocks
- New Attack: Earthquake
- Hidden Detection
- Yes
- Hidden Detection
- Yes
- Resistance
- 1k
- Core Blast: DPS
- 3.5m
- Core Blast: Damage
- 84m
- Core Blast: Attack Cooldown
- 24s
- Core Blast: Range
- 165m
- Core Blast: Explosion Range
- 15m
- Drills: Maximum DPS
- 7.5m
- Drills: Maximum Damage
- 750k
- Drills: Attack Cooldown
- 0.1s
- Drills: Range
- 80m
- Drills: Charge Time
- 5s
- Drills: Retargetting Time
- 0.01s
- Drills: Overcharge Amount
- 75m
- Drills: Overcharge Cooldown
- 5s
- Earthquake: DPS
- 3.75m
- Earthquake: Damage
- 75m
- Earthquake: Attack Cooldown
- 20s
- Earthquake: Range
- 95m
- Earthquake: Attack Angle
- 360º
- Relocate: Relocate Damage
- 17.5m
- Relocate: Relocate Cooldown
- 30s
- Relocate: Relocate Damage Range
- 60m
Level 3
- Price
- 17.5m
- Unlocks
- New Attack: Missile Launch
- Hidden Detection
- Yes
- Hidden Detection
- Yes
- Resistance
- 1k
- Core Blast: DPS
- 4.16m
- Core Blast: Damage
- 100m
- Core Blast: Attack Cooldown
- 24s
- Core Blast: Range
- 165m
- Core Blast: Explosion Range
- 17.5m
- Drills: Maximum DPS
- 9.5m
- Drills: Maximum Damage
- 950k
- Drills: Attack Cooldown
- 0.1s
- Drills: Range
- 85m
- Drills: Charge Time
- 5s
- Drills: Retargetting Time
- 0.01s
- Drills: Overcharge Amount
- 95m
- Drills: Overcharge Cooldown
- 5s
- Earthquake: DPS
- 4.5m
- Earthquake: Damage
- 90m
- Earthquake: Attack Cooldown
- 20s
- Earthquake: Range
- 95m
- Earthquake: Attack Angle
- 360º
- Missile Launch: DPS
- 5.22m
- Missile Launch: Damage
- 47m
- Missile Launch: Attack Cooldown
- 9s
- Missile Launch: Range
- 195m
- Missile Launch: Explosion
- 30m
- Relocate: Relocate Damage
- 25m
- Relocate: Relocate Cooldown
- 30s
- Relocate: Relocate Damage Range
- 60m
Level 4
- Price
- 22.5m
- Hidden Detection
- Yes
- Hidden Detection
- Yes
- Resistance
- 1k
- Core Blast: DPS
- 5.5m
- Core Blast: Damage
- 132m
- Core Blast: Attack Cooldown
- 24s
- Core Blast: Range
- 180m
- Core Blast: Explosion Range
- 17.5m
- Drills: Maximum DPS
- 12.5m
- Drills: Maximum Damage
- 1.25m
- Drills: Attack Cooldown
- 0.1s
- Drills: Range
- 90m
- Drills: Charge Time
- 5s
- Drills: Retargetting Time
- 0.01s
- Drills: Overcharge Amount
- 130m
- Drills: Overcharge Cooldown
- 5s
- Earthquake: DPS
- 5.75m
- Earthquake: Damage
- 115m
- Earthquake: Attack Cooldown
- 20s
- Earthquake: Range
- 125m
- Earthquake: Attack Angle
- 360º
- Missile Launch: DPS
- 7.55m
- Missile Launch: Damage
- 68m
- Missile Launch: Attack Cooldown
- 9s
- Missile Launch: Range
- 205m
- Missile Launch: Explosion
- 35m
- Relocate: Relocate Damage
- 50m
- Relocate: Relocate Cooldown
- 30s
- Relocate: Relocate Damage Range
- 70m
Max level
- Price
- 32.5m
- Unlocks
- New Attack: Pickaxe Slash and Pickaxe Toss
- Hidden Detection
- Yes
- Hidden Detection
- Yes
- Resistance
- 1k
- Core Blast: DPS
- 7.5m
- Core Blast: Damage
- 180m
- Core Blast: Attack Cooldown
- 24s
- Core Blast: Range
- 185m
- Core Blast: Explosion Range
- 17.5m
- Drills: Maximum DPS
- 16.5m
- Drills: Maximum Damage
- 1.65m
- Drills: Attack Cooldown
- 0.1s
- Drills: Range
- 90m
- Drills: Charge Time
- 5s
- Drills: Retargetting Time
- 0.01s
- Drills: Overcharge Amount
- 200m
- Drills: Overcharge Cooldown
- 5s
- Earthquake: DPS
- 7m
- Earthquake: Damage
- 140m
- Earthquake: Attack Cooldown
- 20s
- Earthquake: Range
- 135m
- Earthquake: Attack Angle
- 360º
- Missile Launch: DPS
- 8.88m
- Missile Launch: Damage
- 88m
- Missile Launch: Attack Cooldown
- 9s
- Missile Launch: Range
- 210m
- Missile Launch: Explosion
- 40m
- Pickaxe Slash: DPS
- 5.4m
- Pickaxe Slash: Damage
- 27m
- Pickaxe Slash: Attack Cooldown
- 5s
- Pickaxe Slash: Range
- 95m
- Pickaxe Slash: Attack Angle
- 25º
- Pickaxe Toss: DPS
- 4m
- Pickaxe Toss: Damage
- 50m
- Pickaxe Toss: Attack Cooldown
- 12.5s
- Pickaxe Toss: Range
- 170m
- Pickaxe Toss: Line AOE Width
- 7.5m
- Relocate: Relocate Damage
- 100m
- Relocate: Relocate Cooldown
- 30s
- Relocate: Relocate Damage Range
- 75m
- Attack Switch Mode: TOTAL DRILL DPS
- 39.880.000
- Attack Switch Mode: TOTAL PICKAXE DPS
- 25.780.000
How to use it
It is a strange tower, but a strong one. Heavy area damage and high DPS let it handle nightmare runs and other demanding chapters, and once it is down it will probably wipe out most of them.
Because it can move around the map so easily, it is also handy on chapter 6 and its nightmare version.
Written by rowikis from the Colossal Drillguy card on the official Skibi Defense Trello.
Upgrade costs
| Level | Price | Spent so far | DPS | DPS added per 1k$ |
|---|---|---|---|---|
| Level 0 | 8M$ | 8M$ | 1.41M | 176 |
| Level 1 | 12.5M$ | 20.5M$ | 2.5M | 87.2 |
| Level 2 | 15.5M$ | 36M$ | 7.25M | 306 |
| Level 3 | 17.5M$ | 53.5M$ | 13.9M | 379 |
| Level 4 | 22.5M$ | 76M$ | 18.8M | 219 |
| Max level · best value | 32.5M$ | 109M$ | 32.8M | 430 |
Worked out by rowikis from the levels on the card. Best value is the upgrade that adds the most damage for its price.