Toilets
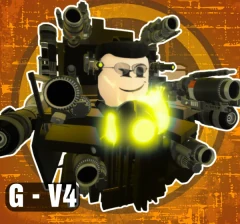
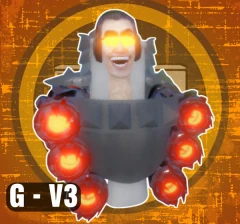
GMAN 5.0
“Really? That’s crazy! One small issue; I don’t remember asking.”
Our take
This late game Toilets tower is among the hardest hitters at max level, so it fits the end of a run once your cash is high. Its damage for the money is below average, so it is about raw power, not value. It sees hidden and flying enemies from placement. You can only place a few per player, and early or middle upgrades give the best damage per cash, with El Hando or Colossal Pencilgirl as similar priced picks.
- Placement price
- 19th cheapest of 19 in Toilets
- Cost to max
- 1.33B$
- DPS at max level
- 197M
- DPS per 1k$ spent
- 147, 85th of 119 towers
- Hidden detection
- From placement
- Air detection
- From placement
Written by rowikis from the tower's stats, not copied from the Trello.
GMAN 5.0, called G-Toilet 5.0 in its own ability text, is an end game tower that attacks with a Core, Heavy Punch, Combo, Shoulder Laser and Arm Laser. An energy shield cuts down stuns from the first level, and level 3 unlocks three combat modes.
TRY ME (stun shield)
The shield shortens long stuns, and it gets stronger as you upgrade:
- Level 0: he endures stuns above 20 seconds with his shield, capping them at 25 seconds.
- Level 1: stuns longer than 15 seconds are cut down to 15 seconds.
- Level 2: stuns longer than 10 seconds are cut down to 10 seconds.
- Level 3 and max level: every stun drops to 5 seconds, since his Determination powers up the shield.
Modes
From level 3 on, a Switch Mode option lets you flip him between LOCKED IN and Relaxed.
- LOCKED IN mode multiplies his damage by 1.2x.
- Reinforcements mode calls the G-Squad and other allies onto the field as units to fight enemies. At level 3 this costs him 25% of his own DPS. The combined DPS is given as 51.188.640 at both level 3 and max level, and the max level text no longer mentions the 25% cut.
Stats by level
Level 0
- Price
- 40m
- Flying Detection
- Yes
- Hidden Detection
- Yes
- Resistance
- 5k
- Core: DPS
- 4m
- Core: Damage
- 400m
- Core: Attack Cooldown
- 100s
- Core: Range
- 999m
- Core: Explosion Range
- 250m
- Heavy Punch: DPS
- 4m
- Heavy Punch: Damage
- 100m
- Heavy Punch: Attack Cooldown
- 25s
- Heavy Punch: Range
- 450m
- Heavy Punch: Attack Angle
- 35º
- Combo: DPS
- 4m
- Combo: Damage
- 40m
- Combo: Attack Cooldown
- 10s
- Combo: Range
- 300m
- Combo: Attack Angle
- 15º
- Shoulder Laser: DPS
- 4m
- Shoulder Laser: Damage
- 2.4m
- Shoulder Laser: Attack Cooldown
- 0.6s
- Shoulder Laser: Range
- 600m
- Shoulder Laser: Explosion Range
- 65m
- Arm Laser: DPS
- 4m
- Arm Laser: Damage
- 2.4m
- Arm Laser: Attack Cooldown
- 0.6s
- Arm Laser: Range
- 600m
- Arm Laser: Explosion Range
- 65m
Level 1
- Price
- 75m
- Flying Detection
- Yes
- Hidden Detection
- Yes
- Resistance
- 5k
- Core: DPS
- 11m
- Core: Damage
- 1.1b
- Core: Attack Cooldown
- 100s
- Core: Range
- 999m
- Core: Explosion Range
- 275m
- Heavy Punch: DPS
- 8m
- Heavy Punch: Damage
- 200m
- Heavy Punch: Attack Cooldown
- 25s
- Heavy Punch: Range
- 450m
- Heavy Punch: Attack Angle
- 35º
- Combo: DPS
- 10m
- Combo: Damage
- 100m
- Combo: Attack Cooldown
- 10s
- Combo: Range
- 300m
- Combo: Attack Angle
- 15º
- Shoulder Laser: DPS
- 8.33m
- Shoulder Laser: Damage
- 5m
- Shoulder Laser: Attack Cooldown
- 0.6s
- Shoulder Laser: Range
- 650m
- Shoulder Laser: Explosion Range
- 65m
- Arm Laser: DPS
- 8.33m
- Arm Laser: Damage
- 5m
- Arm Laser: Attack Cooldown
- 0.6s
- Arm Laser: Range
- 650m
- Arm Laser: Explosion Range
- 65m
Level 2
- Price
- 150m
- Flying Detection
- Yes
- Hidden Detection
- Yes
- Resistance
- 5k
- Core: DPS
- 21m
- Core: Damage
- 2.1b
- Core: Attack Cooldown
- 100s
- Core: Range
- 999m
- Core: Explosion Range
- 300m
- Heavy Punch: DPS
- 17m
- Heavy Punch: Damage
- 425m
- Heavy Punch: Attack Cooldown
- 25s
- Heavy Punch: Range
- 450m
- Heavy Punch: Attack Angle
- 35º
- Combo: DPS
- 18m
- Combo: Damage
- 180m
- Combo: Attack Cooldown
- 10s
- Combo: Range
- 300m
- Combo: Attack Angle
- 15º
- Shoulder Laser: DPS
- 12.5m
- Shoulder Laser: Damage
- 7.5m
- Shoulder Laser: Attack Cooldown
- 0.6s
- Shoulder Laser: Range
- 700m
- Shoulder Laser: Explosion Range
- 70m
- Arm Laser: DPS
- 12.5m
- Arm Laser: Damage
- 7.5m
- Arm Laser: Attack Cooldown
- 0.6s
- Arm Laser: Range
- 700m
- Arm Laser: Explosion Range
- 70m
Level 3
- Price
- 385m
- Flying Detection
- Yes
- Hidden Detection
- Yes
- Resistance
- 5k
- Core: DPS
- 27.5m
- Core: Damage
- 2.75b
- Core: Attack Cooldown
- 100s
- Core: Range
- 999m
- Core: Explosion Range
- 300m
- Heavy Punch: DPS
- 20m
- Heavy Punch: Damage
- 500m
- Heavy Punch: Attack Cooldown
- 25s
- Heavy Punch: Range
- 600m
- Heavy Punch: Attack Angle
- 35º
- Combo: DPS
- 24m
- Combo: Damage
- 240m
- Combo: Attack Cooldown
- 10s
- Combo: Range
- 450m
- Combo: Attack Angle
- 15º
- Shoulder Laser: DPS
- 22.5m
- Shoulder Laser: Damage
- 8.9m
- Shoulder Laser: Attack Cooldown
- 0.4s
- Shoulder Laser: Range
- 750m
- Shoulder Laser: Explosion Range
- 75m
- Arm Laser: DPS
- 22.5m
- Arm Laser: Damage
- 8.9m
- Arm Laser: Attack Cooldown
- 0.4s
- Arm Laser: Range
- 750m
- Arm Laser: Explosion Range
- 75m
Max level
- Price
- 685m
- Flying Detection
- Yes
- Hidden Detection
- Yes
- Resistance
- 5k
- Core: DPS
- 46.2m
- Core: Damage
- 4.62b
- Core: Attack Cooldown
- 100s
- Core: Range
- 999m
- Core: Explosion Range
- 400m
- Heavy Punch: DPS
- 33m
- Heavy Punch: Damage
- 825m
- Heavy Punch: Attack Cooldown
- 25s
- Heavy Punch: Range
- 850m
- Heavy Punch: Attack Angle
- 35º
- Combo: DPS
- 46.2m
- Combo: Damage
- 462m
- Combo: Attack Cooldown
- 10s
- Combo: Range
- 500m
- Combo: Attack Angle
- 15º
- Shoulder Laser: DPS
- 35.75m
- Shoulder Laser: Damage
- 14.3m
- Shoulder Laser: Attack Cooldown
- 0.6s
- Shoulder Laser: Range
- 999m
- Shoulder Laser: Explosion Range
- 125m
- Arm Laser: DPS
- 35.75m
- Arm Laser: Damage
- 14.3m
- Arm Laser: Attack Cooldown
- 0.6s
- Arm Laser: Range
- 999m
- Arm Laser: Explosion Range
- 125m
- Reinforcements mode: TOTAL DPS
- 196.900.000
- Reinforcements mode: TOTAL LOCKED IN DPS
- 236.280.000
- Reinforcements mode: TOTAL G SQUAD DPS
- 214.835.000
Verdict
No real weaknesses come up for G-Toilet 5.0, so if you can get it, take it.
Written by rowikis from the GMAN 5.0 card on the official Skibi Defense Trello.
Upgrade costs
| Level | Price | Spent so far | DPS | DPS added per 1k$ |
|---|---|---|---|---|
| Level 0 | 40M$ | 40M$ | 20M | 500 |
| Level 1 · best value | 75M$ | 115M$ | 45.7M | 342 |
| Level 2 | 150M$ | 265M$ | 81M | 236 |
| Level 3 | 385M$ | 650M$ | 117M | 92.2 |
| Max level | 685M$ | 1.33B$ | 197M | 117 |
Worked out by rowikis from the levels on the card. Best value is the upgrade that adds the most damage for its price.