Cameras
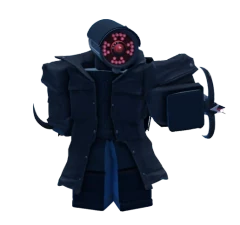
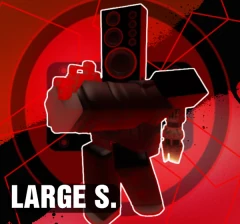
Large Camera
Our take
Large Camera is a cheap early game area tower that slows and knocks enemies back with rockets and slams. It sees hidden enemies from placement but never gets air detection, so you always need a partner that does. Its damage for the money is below average and raw damage is low, and an early or middle upgrade gives the best value. Treat it as a crowd control piece, and Upgraded Cameragirl or Clock Girl cost about the same.
- Placement price
- 9th cheapest of 31 in Cameras
- Cost to max
- 6.8k$
- DPS at max level
- 626
- DPS per 1k$ spent
- 92, 102nd of 119 towers
- Hidden detection
- From placement
- Air detection
- Never
Written by rowikis from the tower's stats, not copied from the Trello.
Large Camera (Large Cam) is a Cameras tower sold in the Lobby Shop that hits crowds with a Ground Slam. It also has two perks: the Baton Large Camera perk, which swings a slowing Baton, and the Large Rocket Camera perk, which moves from a single Rocket up to Rocket Launchers MK-4.
Each lobby upgrade costs 880, and the total for all of them is listed as 4,440.
Stats by level
Set 1, Level 0
- Price
- 600
- Flying Detection
- no
- Hidden Detection
- Yes
- Resistance
- 5
- Ground Slam: DPS
- 80
- Ground Slam: Damage
- 120
- Ground Slam: Attack Cooldown
- 1.5s
- Ground Slam: Range
- 20m
- Ground Slam: Attack Angle
- 360º
Set 1, Level 1
- Price
- 750
- Flying Detection
- no
- Hidden Detection
- Yes
- Resistance
- 8
- Ground Slam: DPS
- 150
- Ground Slam: Damage
- 150
- Ground Slam: Attack Cooldown
- 1s
- Ground Slam: Range
- 22.5m
- Ground Slam: Attack Angle
- 360º
Set 1, Level 2
- Price
- 1.15k
- Flying Detection
- no
- Hidden Detection
- Yes
- Resistance
- 12
- Ground Slam: DPS
- 375
- Ground Slam: Damage
- 375
- Ground Slam: Attack Cooldown
- 1s
- Ground Slam: Range
- 25m
- Ground Slam: Attack Angle
- 360º
Set 1, Level 3
- Price
- 1.95k
- Flying Detection
- no
- Hidden Detection
- Yes
- Resistance
- 15
- Ground Slam: DPS
- 500
- Ground Slam: Damage
- 450
- Ground Slam: Attack Cooldown
- 450
- Ground Slam: Range
- 27.5m
- Ground Slam: Attack Angle
- 360º
Set 1, Max level
- Price
- 2.35k
- Flying Detection
- no
- Hidden Detection
- Yes
- Resistance
- 25
- Ground Slam: DPS
- 656.25
- Ground Slam: Damage
- 525
- Ground Slam: Attack Cooldown
- 0.8s
- Ground Slam: Range
- 30m
- Ground Slam: Attack Angle
- 360º
- Ground Slam: TOTAL DPS
- 625.5*5=3127,5
- Baton Large Camera Perk: Obtainable From
- Lobby Shop
- Baton Large Camera Perk: Perk’s Credits Cost
- 33.5k
- Baton Large Camera Perk: Placement cost
- 750
- Baton Large Camera Perk: Placement limit
- 4
- Baton Large Camera Perk: Commonly referred to as
- Baton camera, Baton Large Camers
- Baton Large Camera Perk: Excels at
- Early To Mid Game, Support
Set 2, Level 0
- Price
- 750
- Resistance
- 10
- Hidden Detection
- Yes
- Flying Detection
- No
- Baton: DPS
- 300
- Baton: Damage
- 900
- Baton: Attack Cooldown
- 3s
- Baton: Range
- 30m
- Baton: Explosion Range
- 2.5m
- Baton: Max Slowed
- 3
Set 2, Level 1
- Price
- 2.25k
- Hidden Detection
- Yes
- Flying Detection
- No
- Resistance
- 25
- Baton: DPS
- 900
- Baton: Damage
- 2.7k
- Baton: Attack Cooldown
- 3s
- Baton: Range
- 30m
- Baton: Explosion Range
- 3m
- Baton: Max Slowed
- 5
Set 2, Level 2
- Price
- 8.8k
- Flying Detection
- Yes
- Hidden Detection
- Yes
- Resistance
- 40
- Baton: DPS
- 5k
- Baton: Damage
- 17.5k
- Baton: Attack Cooldown
- 3.5s
- Baton: Range
- 40m
- Baton: Explosion Range
- 4m
- Baton: Max Slowed
- 10
Set 2, Max level
- Price
- 35k
- Flying Detection
- Yes
- Hidden Detection
- Yes
- Resistance
- 55
- Baton: DPS
- 20k
- Baton: Damage
- 50k
- Baton: Attack Cooldown
- 2.5s
- Baton: Range
- 50m
- Baton: Explosion Range
- 5m
- Baton: Max Slowed
- 12
- Baton: Knockback
- 10
- Baton: TOTAL DPS
- 20.000 * 5 = 100.000
- Large Rocket Camera Perk: Obtainable From
- Crafting
- Large Rocket Camera Perk: Placement cost
- 8k
- Large Rocket Camera Perk: Placement limit
- 2 per player
- Large Rocket Camera Perk: Commonly referred to as
- LRC, Rocket Cam
- Large Rocket Camera Perk: Excels at
- AoE Damage, Single Target Damage, Clearing Hoards, Early-Game, Mid-Game, Late-Game
Set 3, Level 0
- Price
- 8k
- Flying Detection
- Yes
- Hidden Detection
- No
- Resistance
- 15
- Rocket: DPS
- 3k
- Rocket: Damage
- 7.5k
- Rocket: Attack Cooldown
- 2.5s
- Rocket: Range
- 85m
- Rocket: Explosion Range
- 17m
Set 3, Level 1
- Price
- 14k
- Unlocks
- New Attack: Double Rocket
- Flying Detection
- Yes
- Hidden Detection
- No
- Resistance
- 20
- Double Rocket: DPS
- 6.81k (if single target)
- Double Rocket: Damage
- 15k
- Double Rocket: Attack Cooldown
- 2.2s
- Double Rocket: Range
- 85m
- Double Rocket: Explosion Range
- 20m
- Double Rocket: Target Count
- 2
Set 3, Level 2
- Price
- 23k
- Unlocks
- New Attack: Rocket Launchers MK-1
- Flying Detection
- Yes
- Hidden Detection
- Yes
- Resistance
- 36
- Rocket Launchers MK-1: DPS
- 13.25k (if single target)
- Rocket Launchers MK-1: Damage
- 26.5k
- Rocket Launchers MK-1: Attack Cooldown
- 2s
- Rocket Launchers MK-1: Range
- 90m
- Rocket Launchers MK-1: Explosion Range
- 22m
- Rocket Launchers MK-1: Target Count
- 2
Set 3, Level 3
- Price
- 50k
- Unlocks
- New Attack: Rocket Launchers MK-2
- Flying Detection
- Yes
- Hidden Detection
- Yes
- Resistance
- 40
- Rocket Launchers MK-2: DPS
- 26.5k (if single target)
- Rocket Launchers MK-2: Damage
- 53k
- Rocket Launchers MK-2: Attack Cooldown
- 2s
- Rocket Launchers MK-2: Range
- 95m
- Rocket Launchers MK-2: Explosion Range
- 25m
- Rocket Launchers MK-2: Target Count
- 2
Set 3, Level 4
- Price
- 75k
- Unlocks
- New Attack: Rocket Launchers MK-3
- Flying Detection
- Yes
- Hidden Detection
- Yes
- Resistance
- 50
- Rocket Launchers MK-3: DPS
- 50k
- Rocket Launchers MK-3: Damage
- 75k
- Rocket Launchers MK-3: Attack Cooldown
- 1.55s
- Rocket Launchers MK-3: Range
- 105m
- Rocket Launchers MK-3: Explosion Range
- 27.5m
- Rocket Launchers MK-3: Target Count
- 2
Set 3, Max level
- Price
- 150k
- Unlocks
- New Attack: Rocket Launchers MK-4
- Flying Detection
- Yes
- Hidden Detection
- Yes
- Resistance
- 55
- Rocket Launchers MK-4: DPS
- 100k
- Rocket Launchers MK-4: Damage
- 150k
- Rocket Launchers MK-4: Attack Cooldown
- 1.5s
- Rocket Launchers MK-4: Range
- 130m
- Rocket Launchers MK-4: Explosion Range
- 35m
- Rocket Launchers MK-4: Target Count
- 2
- Rocket Launchers MK-4: TOTAL DPS
- 100.000 * 5 = 200.000
Notes
For a cheap shop tower, Large Camera controls crowds very well, which makes it a solid early pick on easier chapters such as 1.5 or 2, where toilets come in large numbers.
Its weak points:
- Placement limit of only 5.
- No flying detection.
- Short range.
Towers like Camera Girl or Camera Fighter can make up for those gaps while Large Camera clears the early waves.
Baton Large Camera perk
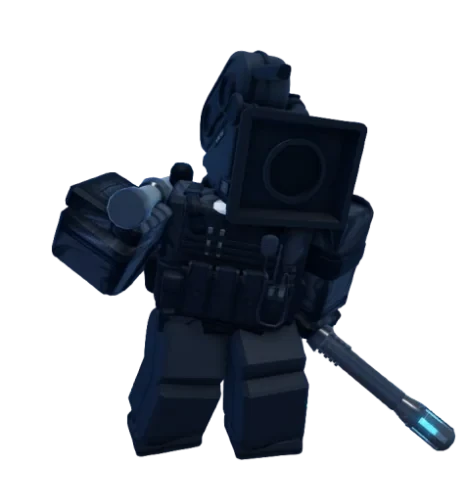
The Baton version ranks among the strongest support towers available. Its own DPS is already good enough for the early part of most chapters, given how little it costs.
Its real value is the slow, which works on most enemies. That buys time for the rest of your defense to finish off the tankier toilets.
Large Rocket Camera perk
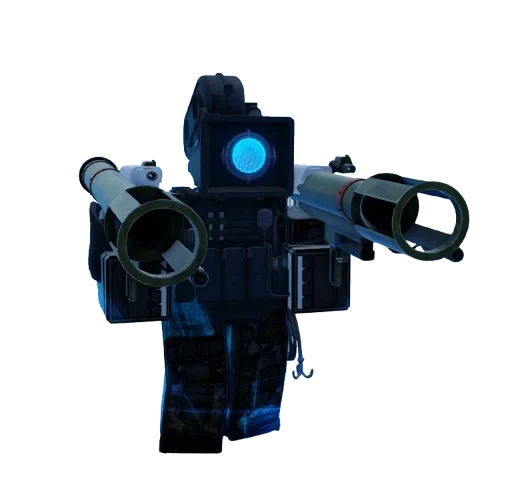
The Large Rocket Cameraman is one of the best early defenders ever, as long as you can work around its missing hidden detection at the lower levels. It is cheap and very strong.
Long range plus huge AOE damage lets it wipe out most early crowds, some Nightmare ones included. Beginners should pick it up.
Written by rowikis from the Large Camera card on the official Skibi Defense Trello.
Upgrade costs
| Level | Price | Spent so far | DPS | DPS added per 1k$ |
|---|---|---|---|---|
| Level 0 | 600$ | 600$ | 80 | 133 |
| Level 1 | 750$ | 1.35k$ | 150 | 93.3 |
| Level 2 · best value | 1.15k$ | 2.5k$ | 375 | 196 |
| Level 3 | 1.95k$ | 4.45k$ | 500 | 64.1 |
| Max level | 2.35k$ | 6.8k$ | 626 | 53.4 |
Worked out by rowikis from the levels on the card. Best value is the upgrade that adds the most damage for its price.